Posted on 15 July 2021 by Buzzbee International
Mated Queens

If inserting a new queen bee into a hive and where urgency may be needed, we recommend inserting a new mated queen and not virgin queen. Generally mated queen bees are accepted within a new colony more than virgin queens however is an option.
Mated queen bees can be purchased from many reputable breeders however be warned, the demand for queens at specific times of the year (usually the mid/end spring) can be high so, if possible, plan for this circumstance.
Buying a new queen bee can be a good thing, where new genetics in your bee yard can breed in resilience, stronger colonies and breed out traits you might not desire.
BEFORE YOU START
So, you have confirmed that you need to introduce a new queen to an existing colony. The first step is for you to order your queen where the breeder should be able to provide you a rough time frame when your queen/s should be available. Based on this timeframe, you can plan the preparation for her arrival.
Checking your new Queen Bee Condition
We recommend that you do not proceed beyond this step until you have the queen bee in your hands. You need to check her condition, that she is healthy, moving around and you may need to even provide her a few drops of sugar syrup or water on to the cage to rehydrate her. If they are cold, then ensure that the cage of bees is placed in a warmer area to encourage more movement.
You may observe a few dead worker bees however this is not unusual because these bees may be older than the queen or they have sacrificed themselves to assist the queen. If some workers are dead or appear to be dying, your new queen needs to be introduced as soon as possible.
Removing the Original Queen Bee
Before any queen bee is introduced into an existing colony, the old/original queen bee needs to be removed. If this is not undertaken, the original queen and potentially the whole colony will try to attack the new queen and kill her.
It is therefore essential that a carefully and thorough inspection is required to ensure no queen or queen cells are present. Anything resembling a queen cell should be removed.
If not queen-less, find the original queen bee and remove her. You will quite likely have to destroy her where she needs to be taken at least several meters away so that her pheromone is not left near the original hive. Another humane way to destroying the queen is placing her into the freezer, where she will slowly fall asleep and die.
Queen-less Period
Once the queen is removed you should allow between 2 to 24 hours where the colony is left queen-less. This is to ensure that the pheromone of the old queen dissipates, and that the colony recognises that they now have no queen. This might provide them some anxiety; however, they should become more receptive of the new queen once she arrives. Some claim that if left greater than 24 hours the risk of the queen being rejected starts to increase. The reason for this is that sometimes colonies will start building an emergency queen cell with one of their eggs.
If a colony was originally queen-less, then no delay will be needed as you can move forward straight into the insertion phase.
If you are trying to re-queen an aggressive colony, it might be recommended to leave them queen-less for at least 48 hours. Colonies that are more aggressive tend to need more time to recognise the need for a new queen. Sometime this is not enough, and longer periods may be required.
Cage Designs
Most cage designs have two methods of releasing the queen. One being the quick release method and the second the time release method.
Quick Release vs Time Release method - The quick release method is controlled by an additional cap/door where on opened, has direct access to the queen inside. Almost all the time we HIGHLY recommend ignoring this quick release method because the whole purpose on using this cage is to release the queen bee into an existing colony over a slow time period. The reason for this is that both the queen and colony need to become familiar and comfortable with each other. This time delay of usually 2 or 3 days tends buys enough time to break down any aggressive behaviours and encourage the acceptance of the new queen. This slower method greatly improves the chances of a successful queen introduction. By missing out this step and trying to force the rapid introduction of the queen often results in the balling and killing of the new queen bee.
 Time Release exit blocked with queen bee candy The queen bee needs to eat through the candy in order to exit. |
 Quick Release exit blocked by a cork. Removing the cork enables the queen bee to exit quickly. |
The only time we might use the quick release method is if the queen has been in the hive and cage for over a week. By then the colony should have accepted her and would be familiar with her pheromone. An alternative is to use a small stick and push a small hole through the Queen bee Candy to reduce the time that they need to eat through.
STEPS OF INSERTION
When the big moment arrives, there are three ways in which the cage can be inserted. All three methods although slightly different, still require that the cage is placed near the centre frames of the brood. This is usually the bottom brood box between frames 4 and 5 on an 8-frame hive or between frames 5 and 6 on a 10-frame brood box. The reason is that you want to place the queen where the majority of the bees are working and nurturing the brood. In addition, you want the queen to emerge from the cage right in the thick of the busy part of the hive.
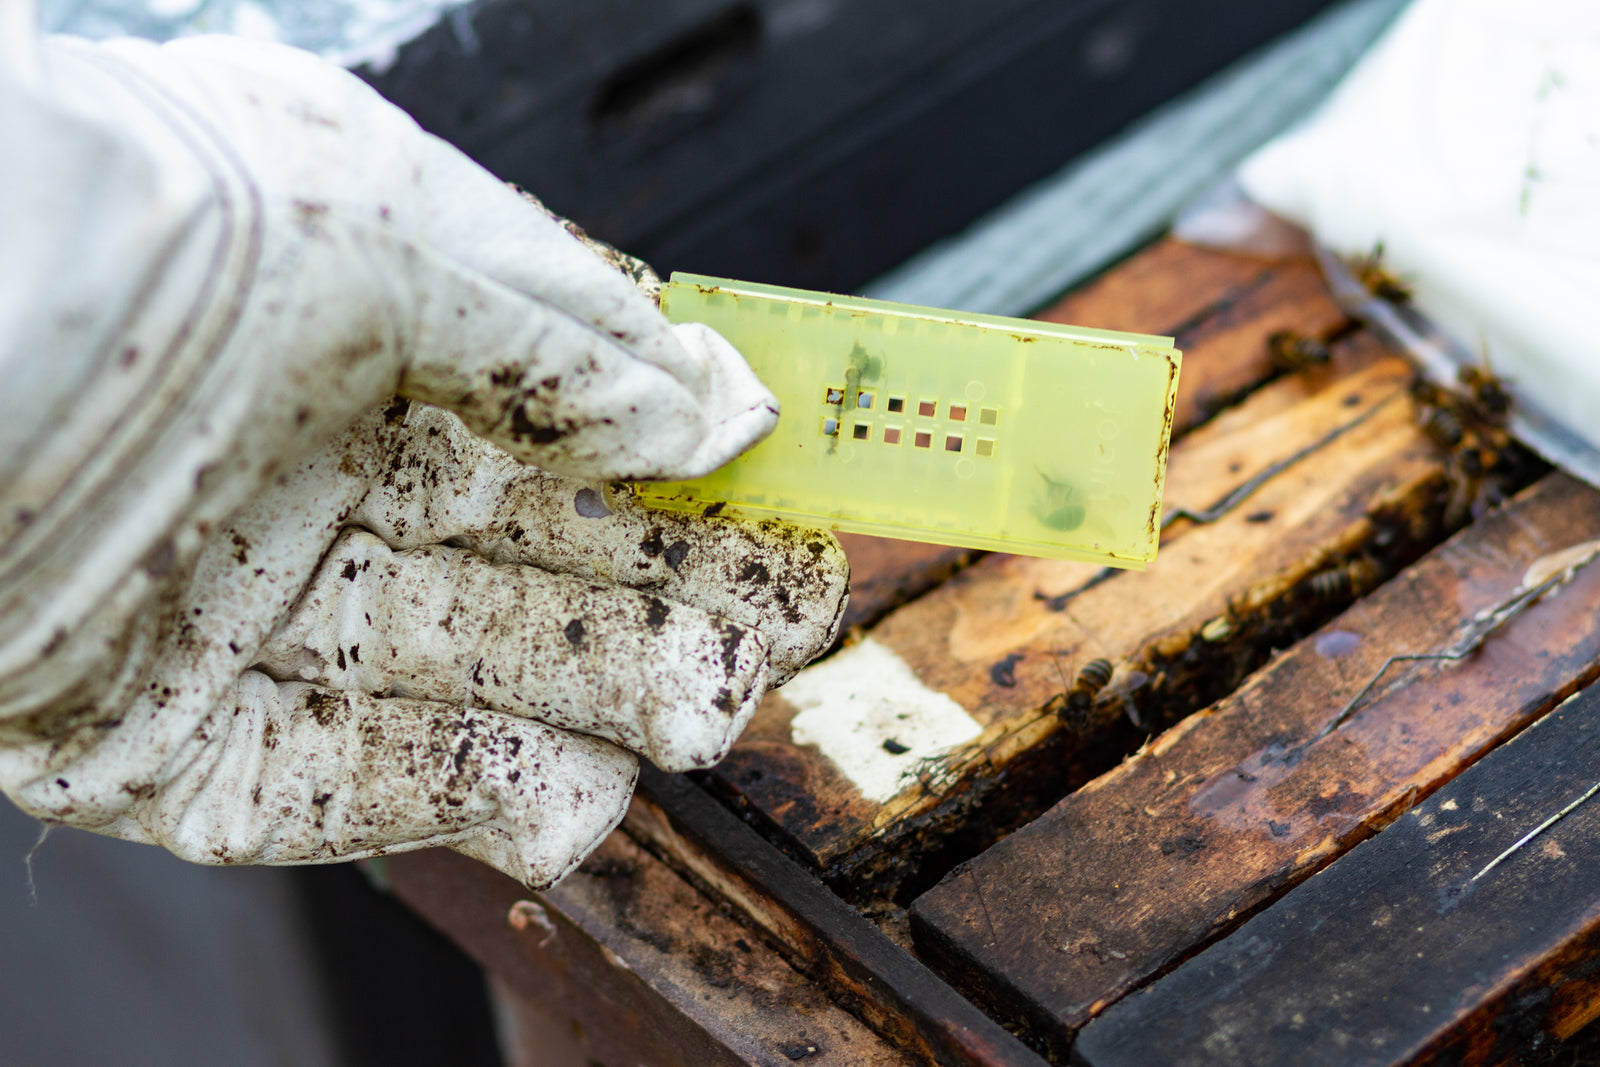
Method 1 – Placed between the top bars of the frames
- Identify where the majority of the brood is currently positioned within the brood super box.
- Find a place on the frames which are slightly indented of where the comb has not been drawn out.
- Before inserting the cage, ensure that the exit hole on the outside of the queen cage is free of any obstructions.

- This is where you would need to place the grill side of the cage (based on wooden cage design with grill on one side) against. The objective is to ensure that the grill side of the cage is not touching any wax comb so that the worker bees of the colony can come in contact with the grill of the cage. This will allow the colony to not only potentially touch the new queen, feed her but also allow her pheromone to flow through the gap of the grill and into the hive.
- This method requires you to slightly open up a gap between two frames using a hive tool, to allow for enough space to insert the cage.
- This is where you would need to place the grill side of the cage (based on wooden cage design with grill on one side) against. The objective is to ensure that the grill side of the cage is not touching any wax comb so that the worker bees of the colony can come in contact with the grill of the cage. This will allow the colony to not only potentially touch the new queen, feed her but also allow her pheromone to flow through the gap of the grill and into the hive.
 Clearing comb away from area where mesh face will be touching comb |
 Queen bee cage set at 45 degrees with a clearance between brood comb and the cage mesh |
-
One common mistake on the insertion method is the orientation of the cage. Ensure that the food side of the cage is facing 45° upwards. This means that the queen inside will need to eat upwards at an angle in order to escape the cage. The reason for the angle is to ensure that if there are any dead worker/host bees inside the cage, that they do not fall onto the area where the exit route is located. Aided with gravity, the dead bees would fall downwards and away from the exit.

- Try to ensure that the cage is pushed below the top of the frames so as to not interfere with the above super or inner cover that might be placed above it.
- Once complete, close up the hive and leave for at least 4 days.
- On returning, around 4 days later and minimising any disturbances; try to look down the exit hole area of the cage and see whether the queen has eaten her way free.
- If not repeat the process in 3 further day and if again then look at trying to assist her release.
- If yes, she is free then without undertaking any disturbance (leave the cage in place) close up and do not disturb for at least further 10 days. This will allow her to climatise to the new environment, start laying new eggs and allow the early eggs to start becoming larvae. This non-disturb period will provide the queen time to settle in and start working. However, be aware although 10 days might seem sufficient, if the weather conditions are cool, this can discourage her from laying eggs thus slowing down the settling in period.
-
TIP
- Place the 45° angle towards the front of the hive. The reason being when you open up the hive in a few days later, you should then easily and quickly be able to see if the queen has eaten through.
|
|
Queen bee cage inserted between frames and after 2/3 days have eaten their way out. |


- Picture (still eating through) / Eaten through
- Need to ensure mesh/ventilation area of cage is exposed when positioned to allow the new colony to interact with the queen. This also allows the queen pheromone to flow through this area and into the hive.
-
Advantages and Disadvantages
-
Advantages
- Positions the Queen in the right area of the hive
- Quick insertion into the hive
- Easily angle the cage to ensure dead host bees fall away from the exit area
- Easily and quick to check queen bee has eaten her way out
-
Disadvantages
- Can be a little fiddly in having to open up the flames slightly in order to insert the cage
- Need to angle the cage at 45° in order to ensure best results
-
Advantages
Method 2 – Placed on the top bars of the brood frames
- Identify where the majority of the brood is currently positioned within the brood super box. If there is more than one brood box, then it likely to be the bottom box with the majority of bees.
- Before inserting the cage, ensure that the exit hole on the outside of the queen cage is free of any obstructions.

- Place the cage on top of the brood frames between two of the busiest and densest filled brood frames. If the cage only has a mesh on one side, then ensure this is facing downwards.

-
TIP
- Endure that if you use this technique that the cage can sit low enough so that if placing an inner cover or another super over the cage, that it does not interfere with the placement.
- When placing the cage on top of the frames, it is advised to point the food end towards the front of the hive. This will aid for quick inspections where the beekeeper can look at the exit hole area of the cage and work out whether the queen has escaped.
-
Advantages and Disadvantages
-
Advantages
- Positions the Queen in the right area of the hive
- Quick insertion into the hive
- Easily angle the cage to ensure dead host bees fall away from the exit area
- Easily and quick to check queen bee has eaten her way out
-
Disadvantages
- The queen cage is usually laid flat which can sometimes cause issues if dead host bees block the exit.
- The width/height of the cage once placed on top of the frames, can be too thick to allow an inner cover or another super to be placed over itself.
-
Advantages
Method 3 – Inserted into the comb/bottom of a frame
- Identify where the majority of the brood is currently positioned within the brood super box. If there is more than one brood box, then it likely to be the bottom box with the majority of bees.
- Pull out the desired frame that you wish to insert the frame into.
- Find a place that you could secure the cage into position. You may need to clear some drawn comb with your hive tool to ensure the cage can be embedded securely.

- Before inserting the cage, ensure that the exit hole on the outside of the queen cage is free of any obstructions.

- Ideally and if possible, angle the food side (queen bee candy) is angled slightly upwards, to reduce the chance any dead host bees falling Infront and blocking the exit.
- Once secured, slowly lower the frame back into place taking care as not to knock the cage.

-
TIP
- Endure that if you use this technique that the cage can sit low enough so that if placing an inner cover or another super over the cage, that it does not interfere with the placement.
-
Advantages and Disadvantages
-
Advantages
- Positions the Queen in the right area and deep into the hive.
- Cage is much more central the brood.
-
Disadvantages
- Take longer to prepare the insertion into the hive as a space on a frame needs to be found and potentially prepared.
- Due to its desired location on a frame, potentially some brood might have to be destroyed to allow the cage to be inserted.
- Sometimes the cage can fall out of the frame when reinserting the frame back into the hive.
- If the queen cage is laid flat along the bottom bar of the frame, this can sometimes cause issues if dead host bees block the exit. This can be overcome if the cage can be angled slightly upwards with the food area upwards.
- Difficult to know whether the queen has eaten her way out without removing the frame from the hive to inspect the status.
-
Advantages
Method 4 – Introduction Cage Method
- Choose a frame of sealed brood which is about to emerge
- Gently brush off the bees and slowly press the introduction cage into the frame directly over the sealed brood. Try to minimise the amount of brood that you might damage or destroy.
- Place the queen in the cage, then seal the entry hole.
- Remove the cap in a few days to release the queen to the newly emerged bees
- Alternatively, you can use a candy/fondant plug if you are confident the brood will emerge before the workers in the hive eat through it.
- Once the queen has left the cage, it can be removed from the frame.
-
Advantages and Disadvantages
-
Advantages
- Lots of positive feedback from experienced beekeepers who have used this technique
- Cage is central to the brood.
- The new brood is used as part of the acclimatisation process, thus increasing the chance of accepting the queen.
-
Disadvantages
- May be difficult to acquire the cages required
- More fiddly process
- Used more steps than the other methods
- May damage some of the unborn brood by inserting the larger cage.
-
Advantages
AFTER INSERTION
The queen, her host bees and the colony will take between 2 to 4 days to eat through the queen candy food to allow her to escape the cage. It is recommended to minimise any disturbance in the hive for at least two weeks however we recommend, if possible, to undertake a quick look at day 4 if minimum disturbance can be undertaken. This is usually only possible using the method 1 and 2 method where the cage and frames do not need to be moved.
If the queen has escaped, then everything is going to plan and leave the hive for a further 10 days. This is to ensure the queen is not disrupted, she a customises to the colony, and then start laying. Do not feel the urge to get into the hive quickly as this can disrupt her cycle.
However, if after 4 days, the queen has not escaped and the food cake has not been touched, then one technique can be used to encourage the escaping process. Simply and carefully whist ensuring not coming in contact with the bees inside the cage, insert a small stick through the queen bee candy to allow a small hole though the centre. Ensure that the hole is not big enough that worker bees and the queen can get out but reduces the amount of eating they need to undergo. Recheck the hive in another 3 days to ensure everything is back on track.
If the queen bee has still not escaped after 1 week from the initial insertion, then the only option will be to open up the quick release exit. Open and leave back in the same position.
Note: Be aware that the timeframe that she may start laying eggs can be influenced by a number of factors. These can be cooler weather conditions, whether the hive inside is warm or cold, strength of the current colony and many more factors.
MORE INFORMATION
- Some beekeepers suggest spraying sugar water on the workers in the hive before introducing the new queen to distract them
- As a general rule, virgin queens are more difficult to introduce into established hives than mated queens
- If you suspect a hive has been queen-less for a while, inspect for laying workers. You will see poorly centred eggs, and often multiple eggs in a cell. These hives can be very difficult to re-queen.
- Most common reasons a queen is rejected
- The hive is not actually queen-less
- The hive has been queen-less longer than the beekeeper realised
- There were queen cells in the hive at the time of introduction
- Whichever method you use, the queen should be visually inspected after introduction whenever possible to ensure she has not been injured
DISCLAIMER
Please note that the above techniques that are highlighted in this article, is not a guarantee that your queen bee will have a stress-free and safe introduction into a hive however we are highlighting potential solutions that may or may not be beneficial.